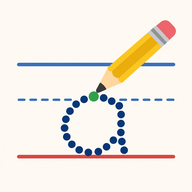
What Zaner-Bloser style print looks like
Zaner-Bloser is a US handwriting program, and its print letters are often called ball and stick letters, because they are built from a few simple shapes:
- Straight lines. Tall lines go straight down from the top line, with no slant.
- Circles. Round letters such as o, a and d are built on a full circle.
- Separate strokes. Many letters are made of a circle and a line, or two lines, so the pencil lifts between strokes.
- No tails. Letters end where the stroke ends, without the small hooks used in D'Nealian style.
The letters on this page are our own single stroke letters drawn in that style. This site is not affiliated with Zaner-Bloser and does not use its fonts, so a few letters may differ slightly from your school's chart.
How to use these worksheets
- Keep the alphabet or edit it. The box starts with Aa to Zz, one pair per page. Delete the lines you do not need, or type words and names instead.
- Pick a tracing style. Dotted lines are the classic look. Light gray is easiest for beginners. Dashed lines print darker on a light printer.
- Leave the stroke helps on. Green starting dots show where the pencil goes down, and the numbers and arrows on the first line show the order and direction of each stroke.
- Print, or save as PDF. Each line in the box becomes its own page.
For a child's name, type it in the box, or use the name tracing worksheet generator, which starts in the same print style.
Zaner-Bloser or D'Nealian style?
Most US schools teach one of these two print styles. Zaner-Bloser style letters stand straight and are built from circles and lines. D'Nealian style letters lean slightly to the right and end with small exit tails that later become cursive joins. If the letters on a worksheet from school lean and the a ends with a hook, use the D'Nealian handwriting worksheets instead.
Both work well. What matters most is matching what the child learns at school, so they practice one set of letter shapes, not two.
Tips for ball and stick letters
- Start circles at about two o'clock and go around to the left, counterclockwise. This one habit makes a, d, g and q much easier later.
- Start tall lines at the top and pull down. Children often push up from the bottom; the starting dots help break that habit.
- Teach letters in groups that share a stroke: l, t, i first, then c, o, a, d, g, then the letters with humps such as n, m, h, r.